NEW PODCAST! Stop Stressing About Perennial Production! (A Panel Discussion)
Tech On Demand podcast episode 187 is a bit different—because it’s a live recording from a panel I moderated at the Darwin Perennials Day event in The Gardens at Ball on June 18. The audio quality is not as good as you’re used to hearing from this podcast, because it’s pulling from microphones in a tent with lunch being served and hundreds of growers in the background chatting about the plants they saw that morning and meetings with more than 30 leading perennial suppliers in the Ball Seed network. But that said, the panelists were excellent, and the content is fantastic.
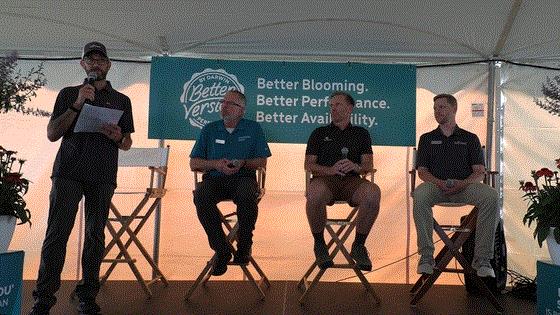
For STOP STRESSING ABOUT PERENNIAL PRODUCTION, the topic was error correction—common challenges in perennial production that can be easily fixed to avoid running into the same issues year after year. The panel included Chris Fifo, perennial guru and product manager with Darwin and PanAmerican Perennials; Drew Koschmann, the director of greenhouses at Walters Gardens; and Nathan Jahnke, culture research manager and head of Ball Seed Technical Services. These guys have so much experience with perennials and crop production techniques that I was excited to have a chance to pick their brains.
Some of the frequent pitfalls the panelists discussed included best practices for overwintering and bulking perennials, why input selection is critical and directly impacts profitability, and evaluating perennial plug and liner quality. I also asked them about managing tough environmental conditions faced in extreme heat or extreme cold times of year. We closed with Nathan sharing new research his team has been working on related to no-pinch production strategies using chemicals like Configure.
Before the lunchtime panel, we solicited questions from the crowd and covered about 10 of them. These free-form topics ranged from how changing USDA climate zones impact perennial trialing, if today’s “speed to market” of new varieties means new plants aren’t trialed well enough, and best practices for lighting echinaceas. I also asked some rapid-fire audience questions about overwintering perennials in large patio pots, how much to cut perennials back before overwintering, breeding lavender for fragrance versus performance and more.
If you missed this year’s Darwin Perennials Day, that’s okay, because Darwin hosts it every year! Mark Wednesday June 17, 2026, on your calendar and come check out the Gardens at Ball to see thousands of perennial plants in bloom. As it gets closer to the event, you’ll find all the details HERE.
Be sure to subscribe to the Tech On Demand podcast on your favorite app so you never miss an episode. And if you’re not a regular listener, jump back into the archives and get caught up—there are 186 more episodes besides this one (as of today).
TECH ON DEMAND ON SPOTIFY
TECH ON DEMAND ON APPLE PODCASTS

Nick’s Tip of the Week: Mum Stewardship Under High Heat
Each week, I’ll work with my buddy Nick Flax, a technical services expert at Ball, to share a concern that’s come up during one of his numerous calls with growers across North America. This week, he’s helping you beat the heat—or at least manage the problems it can cause—in your garden mum crop.
PROBLEM: For the last couple of years, North American garden mum growers have gotten hit by heat waves, and it seems this year is no exception! With 100F temperatures hitting more half of the U.S., anyone with a local forecast that looks like this needs to pay close attention to their mums over the next week or so. (Editor’s Note: Pay close attention to your employees, too. See “Finish Line” below.)
NICK’S TIP: Extreme temperatures create a host of challenges and stressors for mums—particularly in the rootzone. While symptoms of stress in the canopy are more obvious at first glance, it can be difficult to know what’s happening below the soil line without regular scouting and paying close attention to detail. Keep the following items on your radar in the coming days and act quickly to keep your crop happy through the worst of this weather.
Q: New Mums Are Wilting … Is It a Root- or Shoot Concern?
Extreme heat and the physiological stress that comes with it can cause plants to wilt. The thing to pay attention to is: How severely are your mums wilting and how quickly do they recover?
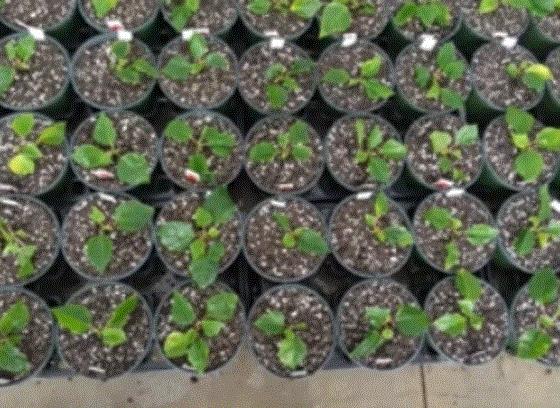
Newly transplanted mum liners that still lack robust root systems are particularly vulnerable in this situation. Incipient wilting (sometimes called “flagging”), where plants appear to just barely start to wilt, is not uncommon for fresh transplants struggling to keep up with the weather.
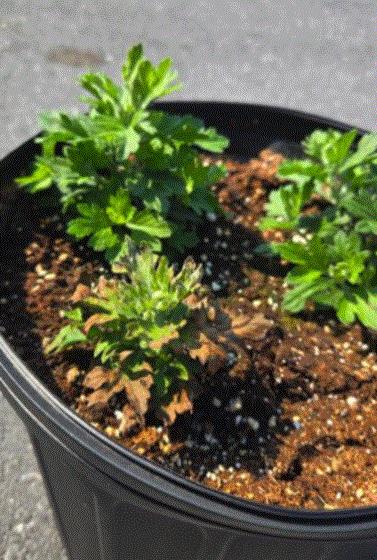
If you see incipient wilting in a newly transplanted mum, be sure to check the roots and crown right at the soil line for symptoms of disease. If roots are discolored or you discover any lesions on the stem near the soil line, act accordingly. Check out some of our quick guides below on common diseases in garden mums and how to manage them appropriately.
If plants are fully turgid in the morning, show signs of incipient wilting midday or in the late afternoon, recover fully at dusk and lack disease symptoms, they should be just fine once we’re past the extreme heat.
If your production infrastructure allows it, consider “syringing” the canopy (quenching the canopy with a fine mist) a few times per day to help reduce high heat-related stress.
Keep in mind that prolonged leaf wetness can increase the chances of foliar disease, so it’s critical that water droplets are very fine and foliage dries within an hour. Repeat as necessary during the hottest part of the day.
Some varieties are more sensitive to high heat than others, and it’s not unusual to see mild discoloration or necrosis along the leaf margin under extreme heat stress.
If you see a high percentage of one or two varieties showing these types of symptoms but roots look fine, consider making a foliar fungicide application after dark when the crop cools off a bit.
This will help protect the canopy from opportunistic pathogens that may try to jump onto compromised leaf and/or stem tissue.
Q: Are Roots Only Growing On One Side of the Pot?
In the early, hottest part of the crop cycle, mum roots often grow on one side of the pot and avoid the other. A couple of factors can affect this but, ultimately, the underlying reason is the same: HEAT!
In outdoor production systems, the south-facing side of the container will almost always have fewer and/or less-robust roots. In North America, this side of the pot has the most direct sun exposure in summertime, and radiant heat from the sun soaks into black plastic pots like a sponge.
If soil temperatures in black plastic pots can reach 126F in northern Minnesota in the summertime, rest assured—soil temps can get even hotter the further south you are. Stress and damage to roots can start to occur above 86 F in many crops, and excessively high soil temps are often responsible for these “voids” in our mum rootzones.
While it can be labor-intensive (especially if you grow thousands of mums), a periodic rotation of pots can help minimize this effect. This keeps one side of the plant from getting pummeled by high soil temps for the whole crop cycle and allows roots to grow back into the voided area.
Another consideration is drip-irrigation emitter placement. If drippers can be placed strategically in a more southerly location in the pot, delivery of water to this area of the rootzone first whenever you water can help combat excessively high soil temps.
Watch Your Soil EC
Mums are high-feed crops and grow best at higher substrate EC (electrical conductivity; a general measure of how much fertilizer/soluble salts are available to plants). In general, it’s best to target a substrate EC of about 3.0 mS/cm or higher during the first half to two thirds of the production cycle to achieve optimal growth. As such, many growers provide constant liquid feed (fertilize every irrigation at around 200-250 ppm N) or alternate fertilizer at high concentrations (more than 300 ppm N) with clear water applications.
However, under extreme heat, uptake of nutrients from the soil often slows and media dries down more rapidly. Both factors can lead to fertilizer salt buildup in the rootzone, which can, in turn, damage roots and open the door for soilborne pathogens. Be sure to spot-check substrate EC levels in your mums and add extra clear water irrigation or two as needed to ensure your roots stay safe from harm!
CHECK OUT THIS VIDEO I made a while back on how to conduct a pour-thru if you aren’t sure what’s the quickest and easiest way to check soil EC.

Poinsettia Propagation: Cutting Assessment & Sticking
I’m not sure why I panicked while starting to write the newsletter this morning—thinking I was late in sharing poinsettia production content. Maybe because it’s been like 85F at 6 a.m. the last few days and that kind of weather usually coincides with peak poinsettia ship weeks. I shot a quick message to the Tech On Demand team and was assured that, while there’s no need to panic because we’re not in peak just yet, that time is quickly approaching and at the moment some earlier shipments are certainly being impacted by heat.
To alleviate my possibly unwarranted anxiety, I’ll use the next few news items to arm you and your poinsettia production team with some info and resources to set the crop up for success as boxes of cuttings start arriving on your dock.
Starting with … assessing cuttings that may be coming in hot and getting them stuck. We do have a video in our 38-part poinsettia series covering SANITATION & URC HANDLING that goes into more depth than I do here.
The key factors to remember in early stages of poinsettia production are sanitation, URC management, media, and disease and insect control. Let’s address these critical topics one at a time:
As with any crop, sanitation begins before your cuttings arrive. Disinfesting all surfaces in cutting-handling areas and prop zones is first and foremost. Don’t forget benches, floors and even ceilings. Growers have found success with quaternary ammonium-based disinfectants, peroxide, chlorine dioxide and other oxidizing agents.
Establishing protocols within your team is the best way to manage sanitation throughout the process. From worker’s hands to feet, cleanliness is so important. Make sure you have new footbaths each season and keep them wet with disinfectant. Growers who create written sanitation protocols will be in the best shape.

When it’s time to receive cuttings, be sure to also have a clear process. One of the first steps when you open your boxes is to check the temperature of those cuttings. Purchase a few infrared thermometers to aid in this process and be sure to check temps both near the outside of the box, as well as in the center near the ice pack. Warm temps (64F/18C) indicate the cuttings may need to be cooled overnight. Temperatures closer to 50F (10C) indicates heating occurred late in the delivery and any damage is unlikely, but if practical, you should store these cuttings in the cooler overnight anyway.
Before cooling poinsettias, remove them from the bags to disperse ethylene and add water to moisten them, if needed. Remember, your cuttings should be firm and crisp when they come out of the cooler to be stuck.
Again, we have a fantastic video about HANDLING HOT POINSETTIA CUTTINGS that I share every summer.
For media, growers have the best success with loose-filled liner trays (avoid plug mixes), stabilized media like Ellepots and Oasis, or direct sticking. Be sure to trial new media types before moving into full-scale production.

Poinsettias (continued)
Once cuttings are stuck, propagation begins and your processes need to be dialed in. Our experts offer tips such as sticking under mist to avoid wilt, applying rooting hormone, and keeping mist high for the first four days until that cutting starts forming roots. Try not to over-mist and avoid water pooling on the leaves.
Moisture management continues to be a priority during these early stages. Soil moisture is most critical from days five through eight as the cutting is callusing and starting to initiate roots.
Try to maintain a “level four” moisture level—wet but not dripping out of the tray. Here’s a quick, less-than-three-minute video covering the 1 TO 5 WATER LEVELS.
Fertility is critical for poinsettia production, but more so in later stages. Media EC will be low at the time of initiation due to leaching but needs to be built back up by day seven.
Stay on top of your phosphorous in this stage. Too much (especially applied over the top) can cause damage to your plants’ growing tips, while too little can result in deficiencies that will need to be addressed later.
In terms of insects, keep your eyes open for fungus gnats early on. Your best way to avoid them is to have an algae-free propagation zone. Monitor with sticky cards and follow moisture management protocols. If you run into fungus gnats, there are plenty of ways, from chemicals to biologicals, to battle them.
Your primary disease pressures will come from Botrytis and Pectobacterium (Erwinia), but preventative controls are available, so be sure to take them into consideration. As with insects, be sure to keep your mist balanced so nothing pops up that will impact your crop as it’s starting to take root. I wrote a lot about Pecto in LAST WEEK’S NEWSLETTER if you want to go deeper into this pathogen.

More Tasks Early in Poinsettia Prop
As those of you who’ve grown poinsettias for years know, getting each step in the production process right is vital to avoiding major problems and producing the highest-quality plants. But when new folks start on your team or changes in management occur, it’s always good to review and share some best practices. To that end, I came up with a poinsettia production “task list” for GrowerTalks a couple years ago and I continue to pull from this list (and our huge poinsettia video series) for the newsletter each year to help break the crop down step by step.

Of course, every greenhouse, crop and scenario is different. From finished pot sizes and dates to market to regionally specific weather and light levels, you know your greenhouse best. That’s why I didn’t indicate week numbers on the task list but simply listed the topics in order. For most of you, young plants will start arriving in big numbers very soon.
NOTE: Click the title of each task for a short video on the topic.
Task—Propagation: Moisture Management
In early stages of poinsettia production, you’ll want to create the best environment possible for your little cuttings until they get established. Misting is a best practice, but be careful not to over-mist. Watch the video for tips. Be sure media is well-drained. And remember, Days 5 through 8 are when the cutting is initiating roots, so be extra vigilant.
Task—Propagation: Nutrition & Fertility
Although your crop won’t need a lot of fertility in Stage 1, you’ll still want to have a clear plan for fertility in the early stages of poinsettia production, with special emphasis on phosphorus management. Building media EC back up by days five to seven is important, as your crop will have little or no media EC at the time of initiation.
Task—Propagation: Pest & Disease Control
Preventative control of fungus gnats is a best practice, and cultural practices like eliminating algae, careful monitoring and moisture management are important. Similarly, you can often prevent common diseases from occurring using some chemical controls, as well as balancing your mist.
Task—Propagation: Environment & Fertility
Moving into Stage 2, environmental management continues to be key to keeping plants healthy. Pulling back on mist (with the goal of being off mist by day 14), slowly increasing light levels and air exchange, reducing relative humidity, and looking at soil temperatures set the stage. You also want to pay close attention to fertility and pH measurements.
Hopefully, you find these tasks useful. I’ll continue to share them throughout the season up until ship time in December.

Finish Line …
I shared a ton of resources above—at least an hour of videos, alone, if you click all the links. So, let’s keep the closing short and sweet (and timely) with seven ways to stay cool when working outside this summer.
Be sure to remind your crews of these regularly so everyone can avoid the miserable and sometimes dangerous consequences. I spent plenty of summers working outside at a garden center and feed store, and I definitely didn’t pay enough attention to hydration and cooling strategies. What can I say—I was young and dumb! Hopefully, your team is smarter than I was, but it never hurts to offer them some tips.

I found most of these on a website called “For Construction Pros” because I figured if anyone knows how tough it is to work in brutal summer heat, it’s those folks:
-
Hydrate, hydrate and hydrate some more. By the time you’re thirsty, you’re already dehydrated. Pre-hydrate before your workday starts and keep drinking something (water is best) all day, every 15 to 20 minutes.
-
Don’t overdo the caffeine. Sure, we all probably need a morning cup of coffee to get rolling, but too much will exacerbate dehydration. Maybe skip the second cup and the after-lunch Americano.
-
Dress to stay cool. Opt for loose-fitting, light-colored clothing and put on a hat. Consider covering as much exposed skin as you can to reduce the risk of sunburn or heat stroke.
-
Eat right. Although it’s tempting to hammer down a big burger at lunch, maybe consider something lighter like a salad on the hottest days. A heavy, protein-loaded meal creates a lot of metabolic heat to break down.
-
Get some industrial fans. No, they won’t simulate AC but they will produce air movement and create a sense of cooling as sweat evaporates from your skin. This probably isn’t an option when working out in the mum field but definitely can help move air around your headhouse when the crew is sticking poinsettias.
-
Freeze a towel. If you put a damp towel in the freezer the night before, you’ll have a cooling device ready to go when the sun is blazing. Keep a bucket of ice water near your jobsite to dunk the towel in throughout the day. This will cool you down quickly.
-
Don’t ignore the warning signs. Heavy sweating (or even worse, not sweating), heart rate spikes, dizziness, bumps appearing on skin, muscle cramps and headaches are heat exhaustion warning signs. These can quickly turn into heat stroke, which is identified by nausea/vomiting, mental confusion, rapid breathing and a racing pulse. Know the signs!
Until next week … try to stay cool! Talk to you next Friday.


Please feel free to send your comments, constructive criticism and topic ideas to me at bcalkins@ballhort.com.

Bill Calkins
Editor - Tech On Demand
This email was received by you and 25,570 other fine subscribers!
If you're interested in advertising in Tech On Demand, contact Kim Brown ASAP and she'll hook you up.