NEW VIDEO: Why Use Rooting Hormones?
In five minutes, Ball Seed culture research manager Nathan Jahnke explains why using rooting hormones not only optimizes uniformity when propagating unrooted cuttings but also reduces potential shrink—meaning you stand to make more money. Talk about a win-win!
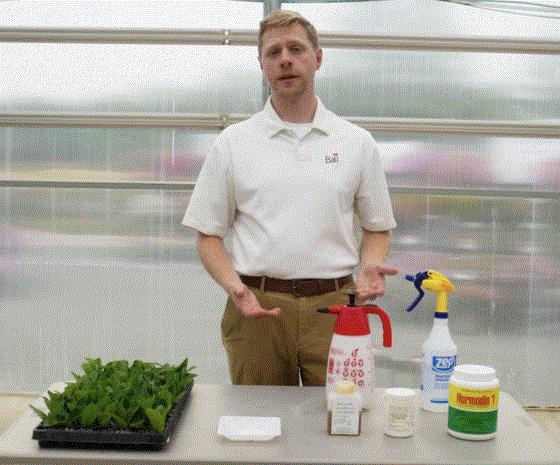
As Nathan explained IN THIS VIDEO, synthetic auxins come in different forms, so you have options that fit into any production system. These include traditional powder hormones, newer water-soluble types, and liquid IBA formulations to spray over the top. He explains pros and cons of all three, application recommendations (including dips) and a bit about the plant science behind synthetic auxins. (As always, be careful and test rates/volumes to avoid phytotoxicity.)
Koppert Corner: Just a Dip Won’t Do
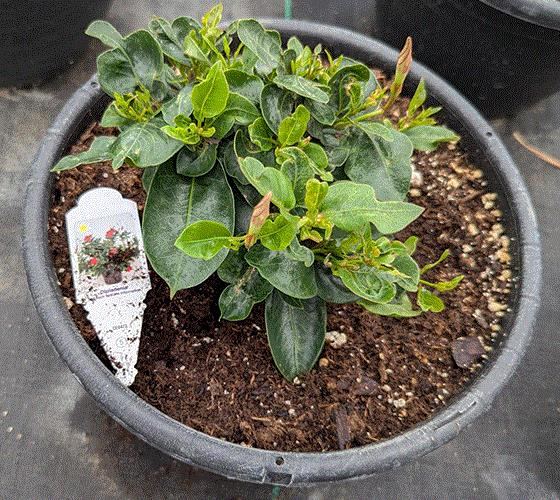
Thrips parvispinus is a particularly damaging species that continues to make its way across the Americas. Already a known invasive species in Florida as of 2022, it’s made its way to cutting stock farms and was first detected on incoming cuttings from offshore farms in 2024. In 2025, dipladenia and mandevilla growers experienced crop damage caused by T. parvispinus that in some cases rendered the finished plants unsellable—as seen in this photo.
Thrips Eggs Slip Through
In 2024, the Ontario Ministry of Agriculture, Food and Agribusiness (OMAFA) and Vineland Research Station sampled a series of incoming cutting shipments to determine how many thrips were arriving on incoming dipladenia and mandevilla cuttings. Larvae and adult numbers were noted and counted upon cuttings arrival. A second count six days later revealed that additional larvae had emerged from the egg stage in days one to five after initial counts were made. What they found is that incoming cuttings were arriving at propagation facilities containing up to nine thrips per 20 cuttings—some in the egg stage, protected from initial cutting dips.
Pre-Winter Proactive Measures
Weekly thrips control measures throughout the propagation and early bulking up phases are key to effectively managing this insect pest. For already potted liners, assume that T. parvispinus are now cycling in recently planted pots or baskets. It’s critical to reduce or eliminate these initial thrips to stop the first generations of T. parvispinus from continuing to reproduce in your crop over winter. Failure to take proactive thrips IPM measures at this stage may result in significantly more costly IPM solutions and potential plant losses in spring.
Avoid chemical insecticides at this time, as these thrips are likely resistant to pesticides or they would have been successfully managed at the stock farms. Instead, start by drenching/sprenching Entonem (Steinernema feltiae) and spraying Isarid (Isaria fumosorosea) + Azadirachtin weekly for the next six weeks. By doing both a sprench and a spray each week, you’ll be impacting larvae, prepupae, pupae and adults to most effectively break their lifecycle and stop T. parvispinus reproduction in your crop.
It is critical that this comprehensive clean-up of newly planted flowering tropicals is completed before baskets are hung in winter. This prevents surprises when the baskets are pulled down to ship in spring.
Not sure what to do to prevent damage to this high-value ornamental crop? Reach out to a Koppert Technical Consultant for advice and support!

Nick’s Tip of the Week: Fungus Gnat G’nonsense
Each week, I’ll work with my buddy Nick Flax, a technical services expert at Ball, to share a concern that’s come up during one of his numerous calls with growers across North America. This week, he’s following up last week’s info on Rhizoctonia with another poinsettia tip—this time the challenge is fungus gnats.
PROBLEM: When a beautiful poinsettia crop is ready to ship or move to retail, the last thing anyone wants to see is a cloud of fungus gnats (Bradysia sp.) billowing out of the pot. Adult gnats flying around are unsightly, but larvae can damage the roots or the crown of your poinsettias and open the door for pathogens like Pythium.

Sad A.I. Nick with Poinsettia Surrounded by Fungus Gnats.
NICK’S TIP: Get those fungus gnats cleaned up NOW so your crop is squeaky clean as it goes out the door to ensure maximum crop longevity and customer satisfaction.
Lead With Moisture Management
Fungus gnats need high soil moisture levels to thrive. As such, the first-line response to rein in fungus gnat pressure is fine-tune your moisture management. However, it can be tricky to accomplish this in a maturing poinsettia crop. If uncooperative weather has necessitated frequent irrigations or your grower team hasn’t reduced irrigation frequency appropriately since the unseasonal warm fall temps finally went away:
-
Aim for a slightly drier “wet target.” On the 1 to 5 scale (1 = air dry; 5 = saturated), ensure that growing media never reaches a level 5. Aim for a moisture level 4 or slightly drier (between level 4 and 3) when you irrigate/fertigate and resist the urge to “water for the weekend” on Fridays.
-
Reduce spot-watering. While it may seem counterintuitive, frequent spot-watering in a mature poinsettia crop can result in greater unevenness in soil moisture levels across the group. Continue to water the outer row or two of plants in a block to counteract edge effect but resist the urge to give plants in the center of the group an extra splash.
Be careful not to run media too dry and ensure that plants do not dry down to moisture level 1. Too-dry growing media can disrupt calcium uptake and result in calcium deficiency symptoms in your youngest bracts, or stress plants and negatively affect development of cyathia.
Lean Into Your Insecticide Toolbox
Good moisture management can naturally suppress fungus gnats over a longer period, but rarely does the job on its own in the span or a few weeks. To get your plants cleaned up and (mostly) fungus gnat-free before ship/sale, you will have to break out some insecticides.
While flying adults are the more noticeable nuisance, target larvae in the soil as your first step in the campaign against fungus gnats. These pests complete a life cycle in three or four weeks, so larvae in the soil now will become flying adults shortly before your plants ship or go to retail.
While there really isn’t a “quick kill” option for fungus gnat larvae, get a jump on them with at least two different insecticides and/or nematodes from now until ship or sale.
Start the substrate drench rotation with an insect growth regulator (IGR). This class of chemicals plays a critical role in fungus gnat management in floriculture crops, but extra caution is required when it comes to IGRs and poinsettias.
-
At this point in the crop cycle, cyromazine (ex. Citation) is one of the few safe IGRs to use on poinsettias.
-
Azadirachtin (ex. Azatin, AzaGuard) is another good option to include in the rotation.
-
Pyriproxyfen (ex. Distance) is only safe to apply to poinsettias before bract development).
-
Diflubenzuron (ex. Adept) should never be applied to poinsettias.
-
Gnatrol (Bacillus thuringiensis subsp. israelensis) is another good option to include, and larvae respond to it fairly quickly. Multiple consecutive applications are generally needed to curb a substantial outbreak.
Nematodes (Steinernema fletiae) are another excellent tool to deploy in this situation. These work very well, but you must make repeat applications to get maximum efficacy. I generally recommend at least two applications no more than one week apart the first time you apply them, and then repeat every (approximately) two weeks, as long as fungus gnat pressure stays low. Increase application frequency to weekly if populations jump again.
Be sure to remove all screens and filters from your injector setup, or you’ll basically shred the nematodes before they even make it into the pot. Get a good amount of nematode solution into each pot and make sure soil moisture is moderate (about level 3 on the 1 to 5 scale) before you apply the drench. Nematodes need soil moisture to move around, so it’s critical to ensure they aren’t diving into a bone-dry soil column.
Timing these applications can be tricky, especially if wet-to-dry cycles are infrequent. While I have personally tank-mixed nematodes and fertilizer with great success in the past, be sure to follow your suppliers’ recommendations on applications procedures to ensure maximum efficacy.
While you’re taking care of the larvae, knock down adults to help further break the life cycle. However, be mindful that there are limited options with respect to effective chemistries to combat adult fungus gnats.
-
Pyrethroids (ex. bifenthrin, cyfluthrin) are one of the more effective tools to kill fungus gnat adults quickly.
-
Decathalon (cyfluthrin) is a wettable powder formulation, so it will likely be safer for bracts than other SC or EC formulations. Keep in mind, since it’s a wettable powder, there’s a chance that some residue may remain on foliage after application.
-
Attain TR is another nice option for smaller greenhouse spaces. While many self-contained applicator cans are aerosols and come with potential phyto risks, I’ve worked with lots of growers who use this product in poinsettias showing color without any issues.
-
Note: While oil-based products may work to knock down fungus gnat adults, many mineral oil-based products may increase the chances of phyto on tender bracts.

Three New #Shorts: Calcium, Boron, Magnesium
We dropped three new quick tech videos in the past week covering key crop nutrition topics—actually, three critical nutrients that can trigger deficiency or toxicity symptoms to watch out for. Learn about boron, calcium and magnesium in just a few minutes.

In each video, Josh Henry explains why the nutrient is important, symptoms that indicate if levels are too low or too high (with photos) and ways to correct levels if damage occurs. Like anything related to plant health, getting nutrients in balance can be tricky, and symptoms can be deceiving.
These three videos add to a growing library of more than 60 Shorts and Reels you can find in our YOUTUBE PLAYLIST and on INSTAGRAM (@balltechondemand). These are perfect for sharing with your entire production team!
Geranium Breakdown Q&A
At this time of year, many of us are either raking leaves in short sleeves or shoveling snow in beanie and gloves. Temperature bounces like this lead to all sorts of issues, from sniffles to seasonal depression—and that’s just in humans. Imagine what the same weather spikes can do to cuttings as they’re shipped from warm climates and stuck at greenhouses in the north!
Here’s a question that comes to technical teams quite often as we head into the holiday season.
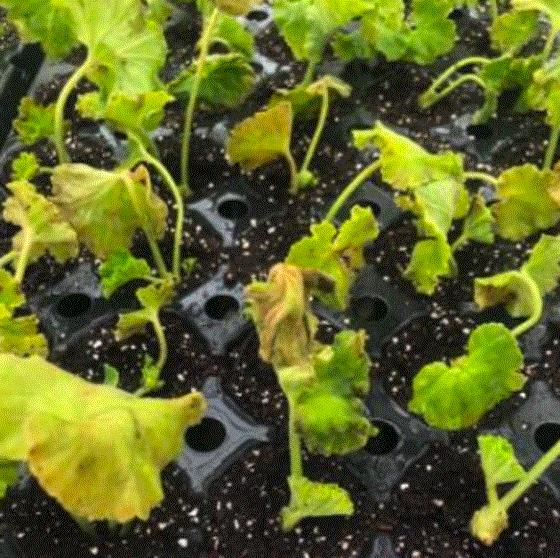
Q: Do you have any idea what would cause this (see photo) to happen on this one geranium variety overnight?
A: This yellowing is likely caused by high temperature or temperature bounces prior to or during transit. Symptoms will develop within 96 hours of sticking if not already present when received. High temperatures cause the plant to use up stored carbohydrates and produce ethylene.
Applying Fascination at 1 to 3 ppm, in conjunction with a water soluble IBA rooting hormone, to minimize leaf yellowing and improve rooting. Note: Fascination, especially when in contact with the substrate and stem end, can inhibit or slow rooting. Severely damaged URCs can be susceptible to Botrytis and other pathogens. Remove decaying leaves and petioles and apply a broad-spectrum fungicide that can withstand misting during propagation.

Finish Line ...
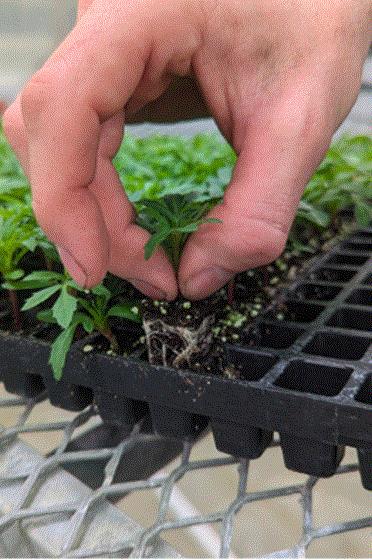
I have to shout out the November GrowerTalks cover story, TRANSPLANTING BEST PRACTICES.
It’s pretty obvious if you read this newsletter regularly that I’m a huge fan of “best practices” as they relate to cultural and technical protocols for greenhouse production. Of course, every season, every crop and every situation is different, but having baseline protocols in place for all team members is half the battle when seeds, cuttings, plugs and liners start cranking through your operation in big numbers and your goal is uniformity.
In the article, Ohio State professor and extension specialist Dr. Garrett Owen covers trialed and tested strategies for every step of the transplanting process and what can happen if steps are missed or overlooked.
Here’s what he discussed:
-
Pre-transplant prep
-
Removing plugs and liners
-
Handling and staging
-
Workstation layout
-
Substrate prep and container filling
-
Planting depth and technique
-
Root ball contact and early irrigation
-
Post-transplant care
-
Quality control
And as Dr. Owen states in closing (such a fantastic reminder), successful transplanting is not just about the physical act of moving plants from one container to another—it’s a comprehensive process that begins with preparation and extends through post-transplant care, all aimed at giving your crops the best possible start.
Have a great weekend and I’ll talk to you next week!


Please feel free to send your comments, constructive criticism and topic ideas to me at bcalkins@ballhort.com.

Bill Calkins
Editor - Tech On Demand
This email was received by you and 25,492 other fine subscribers!
If you're interested in advertising in Tech On Demand, contact Kim Brown ASAP and she'll hook you up.